We have had this tutorial online for a while now and it has been a great success. In this guide we will explain how to make a Japanese Knot Bag!
We will help you to make your own little Japanese bag. It can be used for any occasion and you can put whatever you want in it. We use it to put our daughters’ snacks or bento, EXTRA!
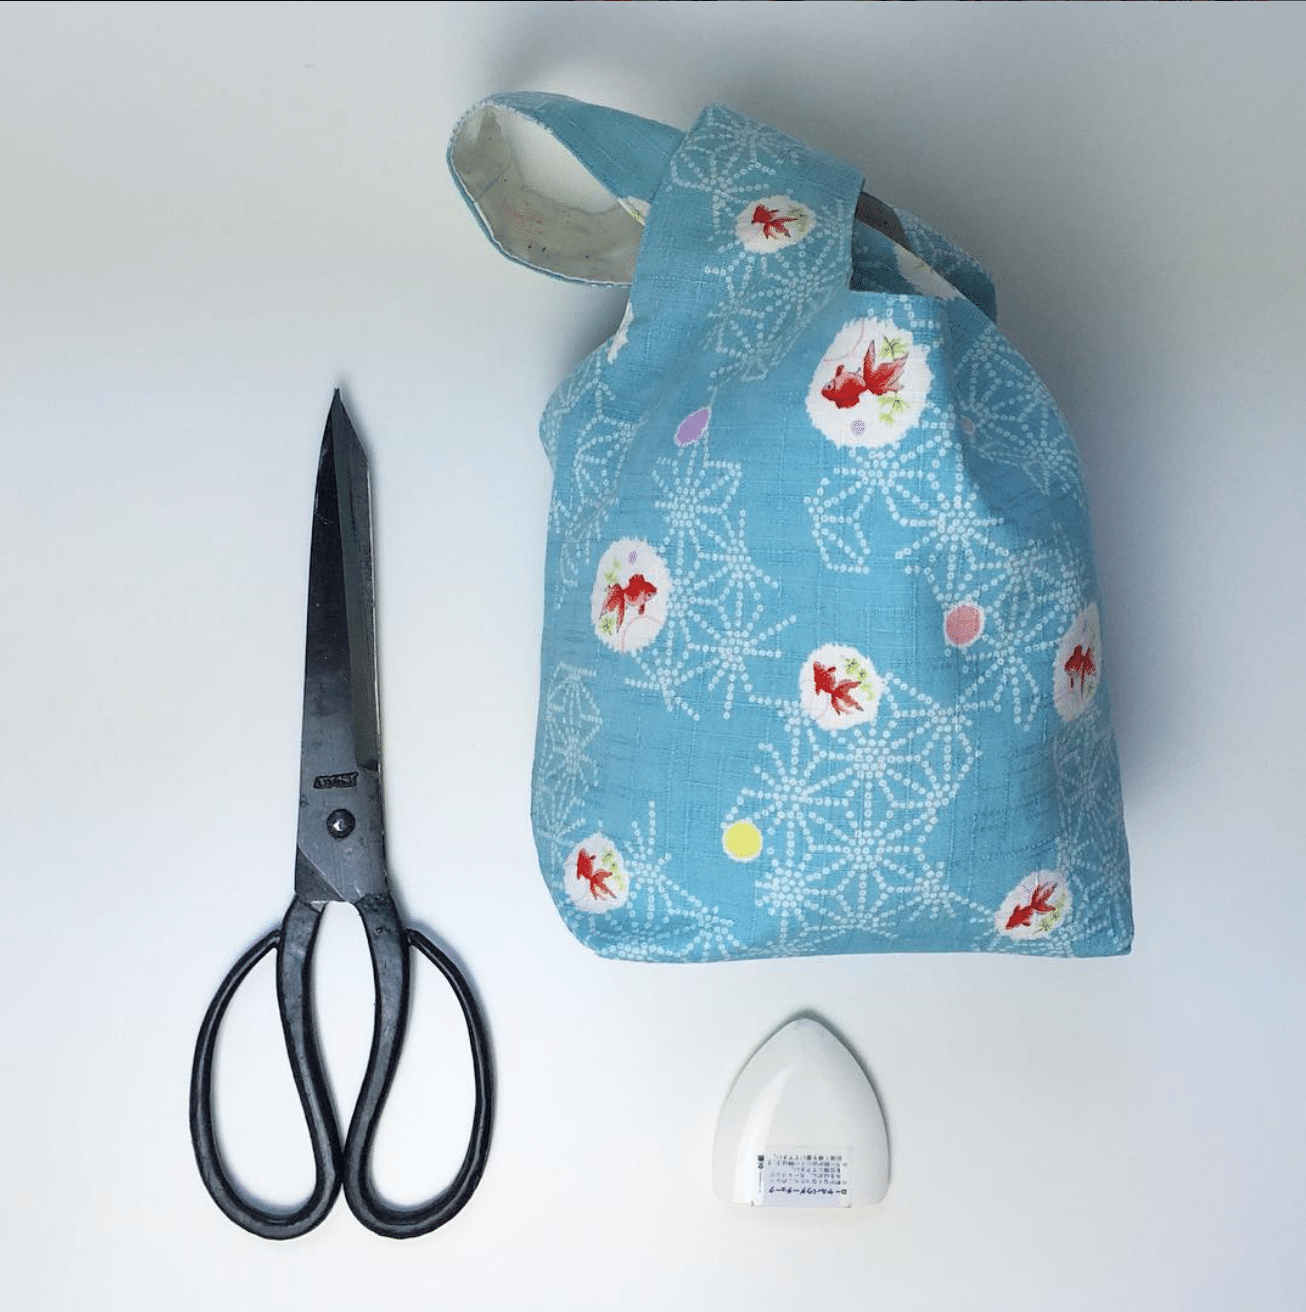
It can be carried by hand, on the shoulder or even on the shoulder strap, depending on the size you want to give it. On this subject, you should know that the size is up to you, you just have to keep the proportions. Here are the different measurements of our bag, small size, carried in the hand.
Tutorials for making Japanese bags are quite rare and we hope you like this one! Ready ?
Préparation
Here we go! Here is the image of the kit to create your Knot Bag. To make this bag in the size we are going to show you, you will need about 50cm / 0,55yards of Japanese fabric (or other) in each colour for the outside and inside, including the base. In our tutorial we used some beautiful fabrics for the outside and inside that are unfortunately no longer printed today (i should update pictures too … ). But we’re sure you’ll find what you’re looking for among our Japanese fabric collection, here are some examples:
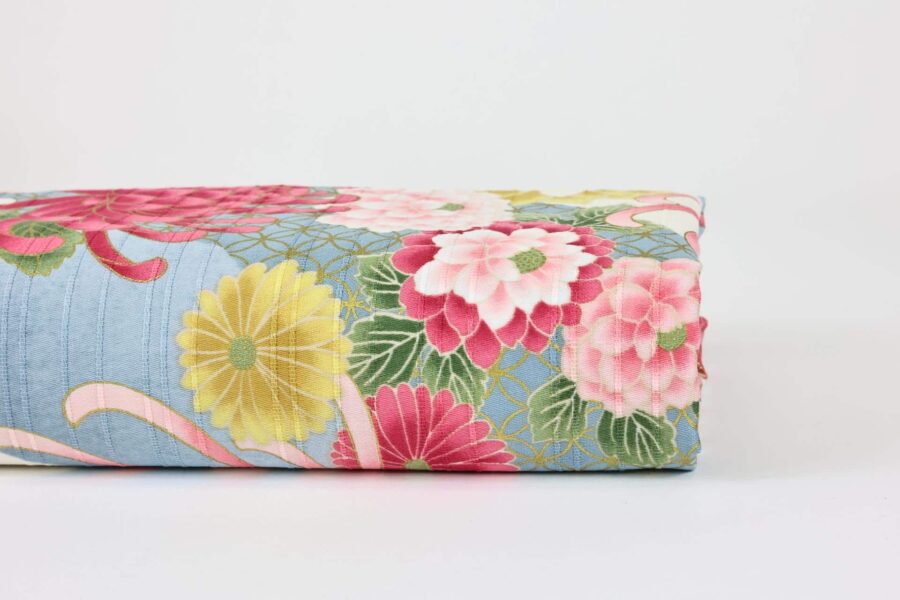
Japanese Chrysanthemum fabric ivory blue background

Japanese fabric with multi-pattern fans
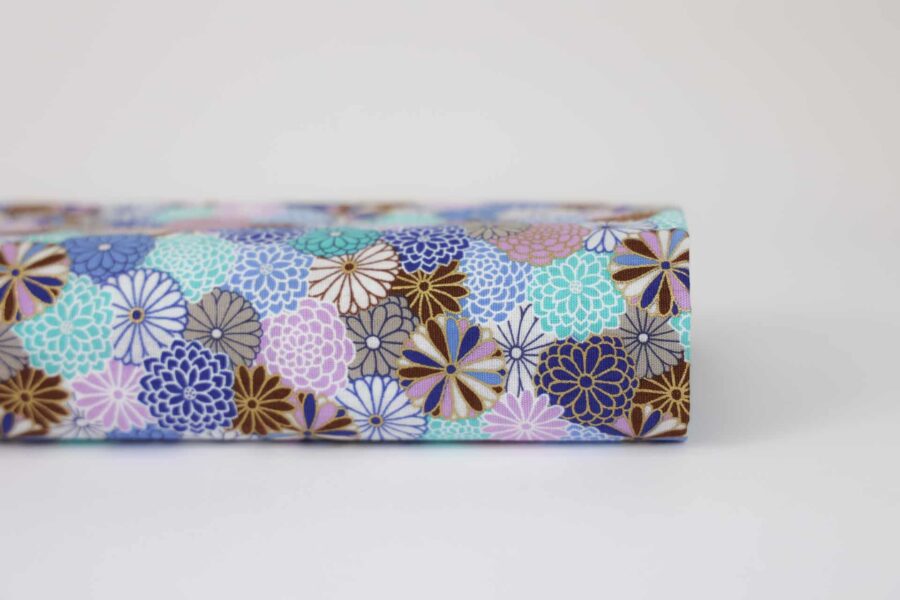
Japanese fabric small blue and golden Kiku
Sewing thread in the same colours as your fabrics A sewing machine and a good pair of scissors. In short, everything you need for the perfect little seamstress 🙂 We would like to point out that this tutorial is not necessarily intended for beginners, but some knowledge in the field is required!

Confection
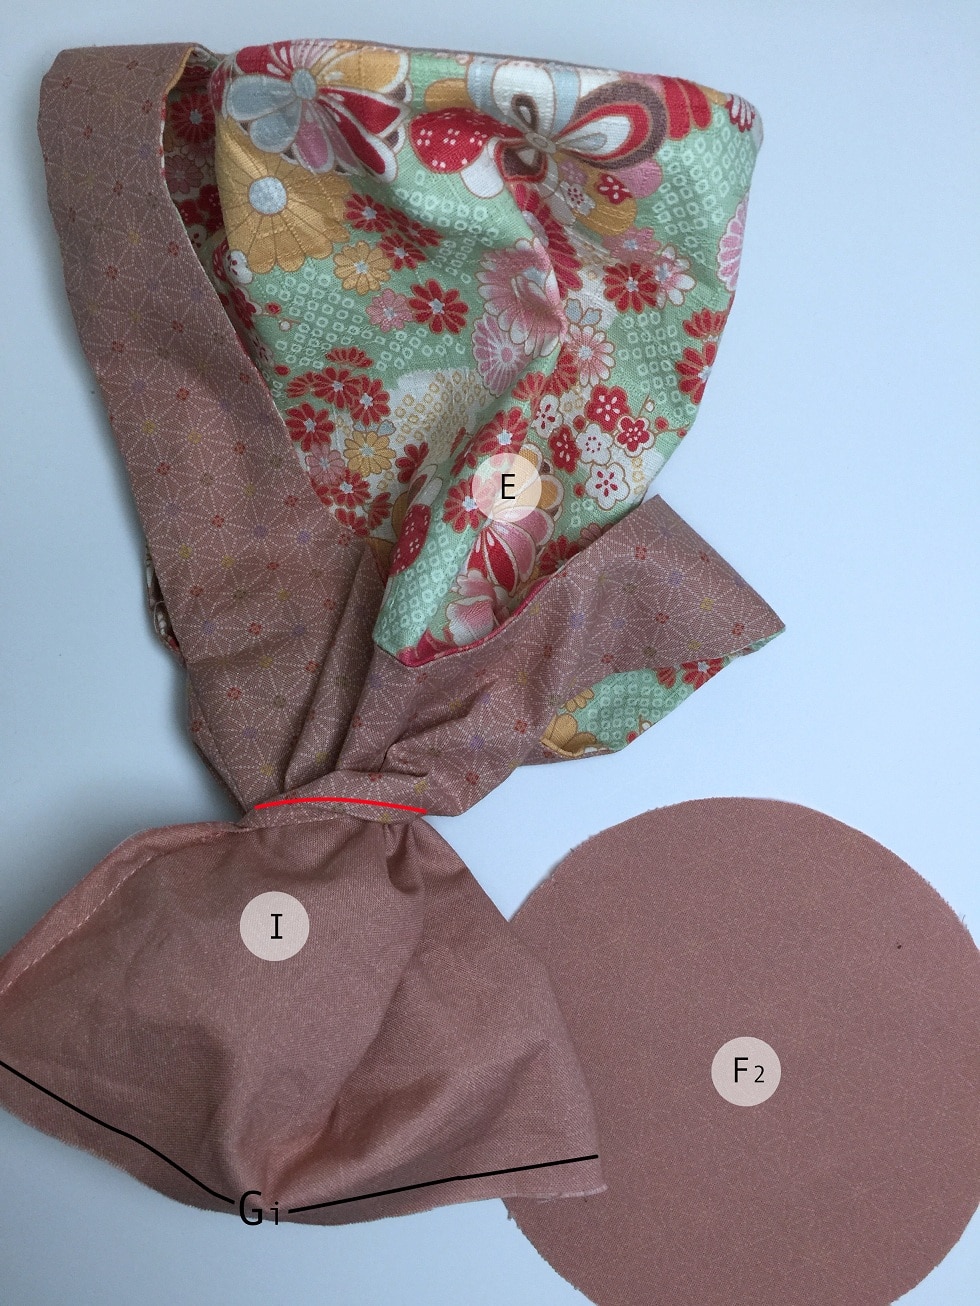
The two parts E1 and E2 will be the outside of your bag while I1 and I2 will be the inside. As for the bottom of the bag, it will be F1 and F2 knowing that you can reinforce the base with a piece of iron-on, but this is not necessary if you do not have any. Please also note that all seams should be 1cm from the edge of the fabric.
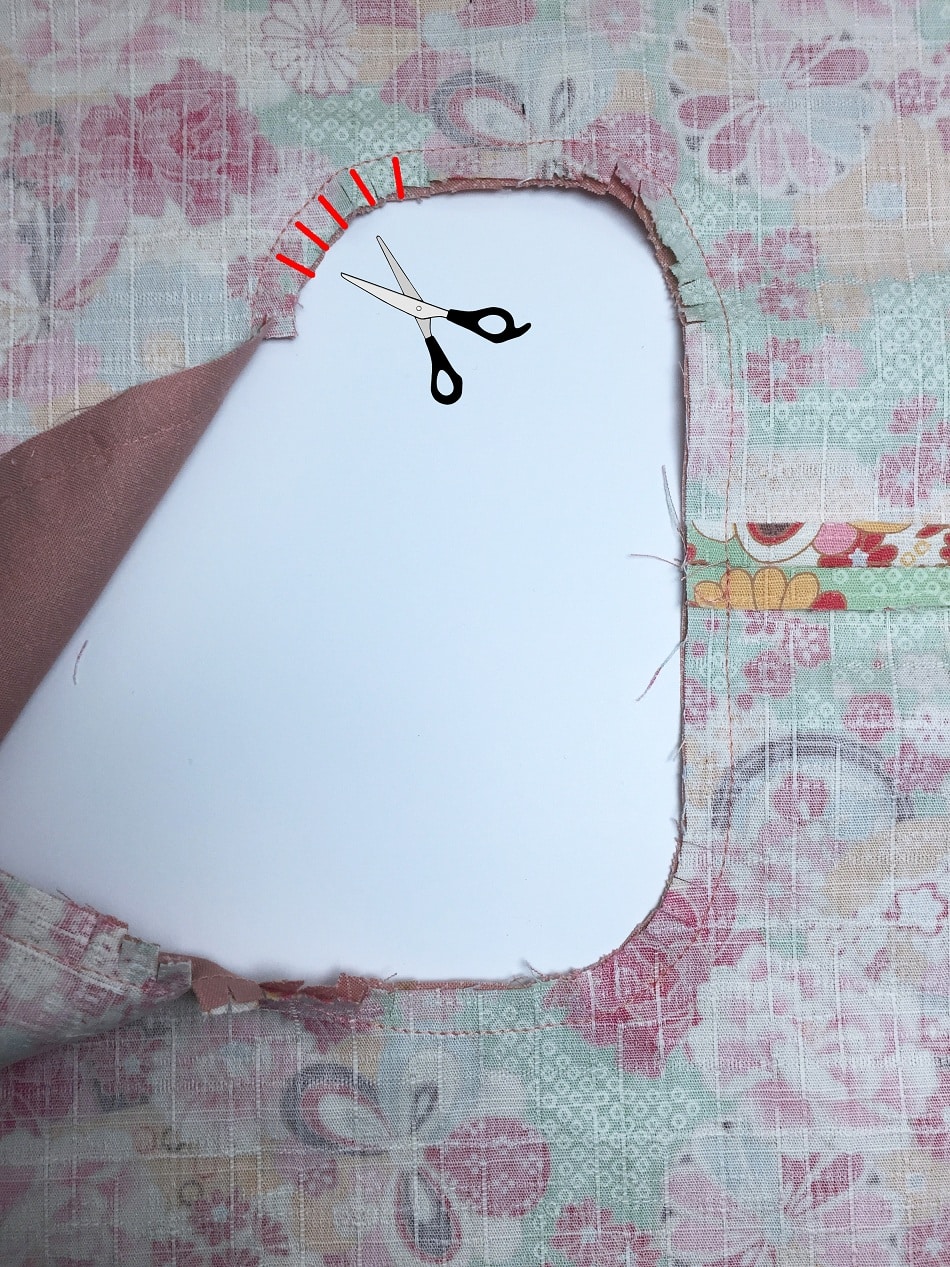
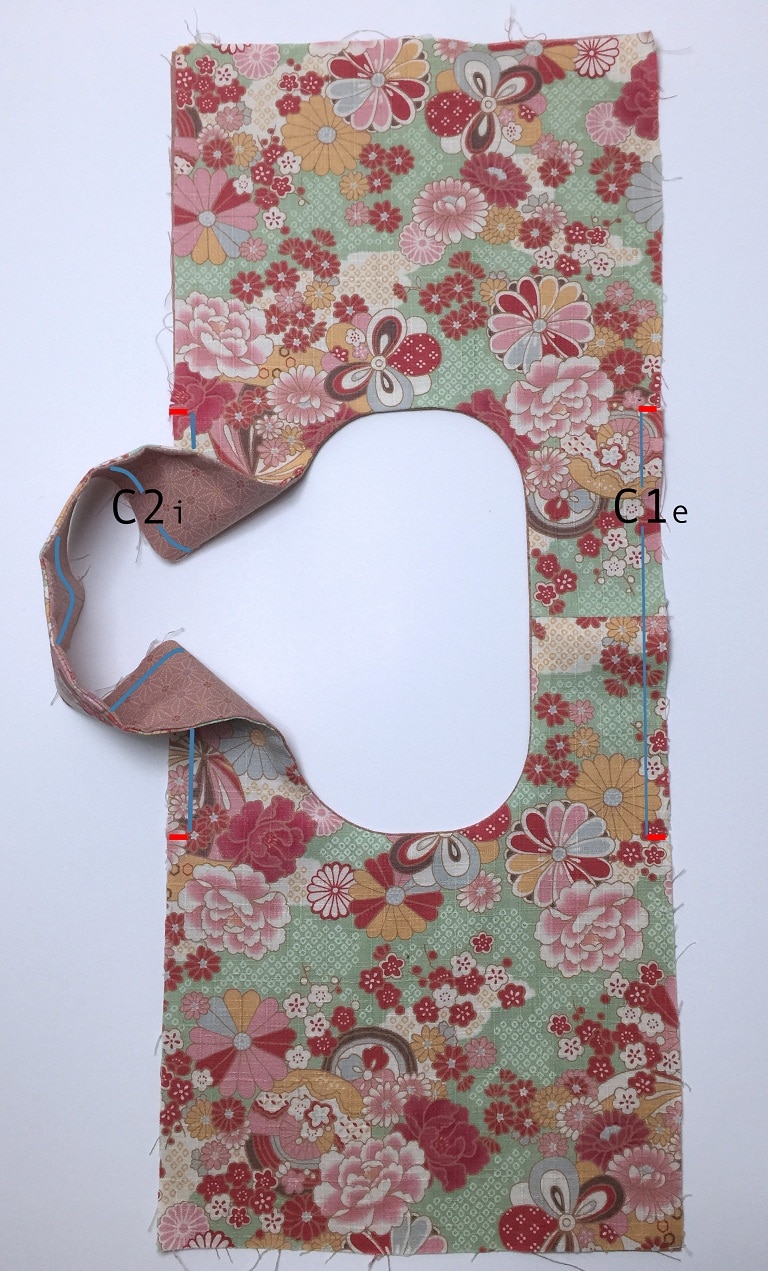
To start, cut a 5mm (0.08in) notch on each side of all the pieces. This will be a marker for later. These cuts are to be made at the red marks shown in the picture at top.
Step 1
Sew the two outer pieces E1 and E2 together right sides together along the line Ae, and the two inner pieces I1 and I2 along the line Ai.
Sew the line Be and Bi together

Step 2
Be careful, all these seams must be done on the back of the fabric.
This is how the Be line is sewn and Bi make a few cuts at the rounded corners to get perfect curves. Then turn over
Step 3
Sew C1e and C1i together without going over the red mark we made before. Sew C2e and C2i together in the same way as before without going over the red marks we made beforehand. Always sew to the back of the fabric as before, 1 cm from the edge of the fabric.
Step 4
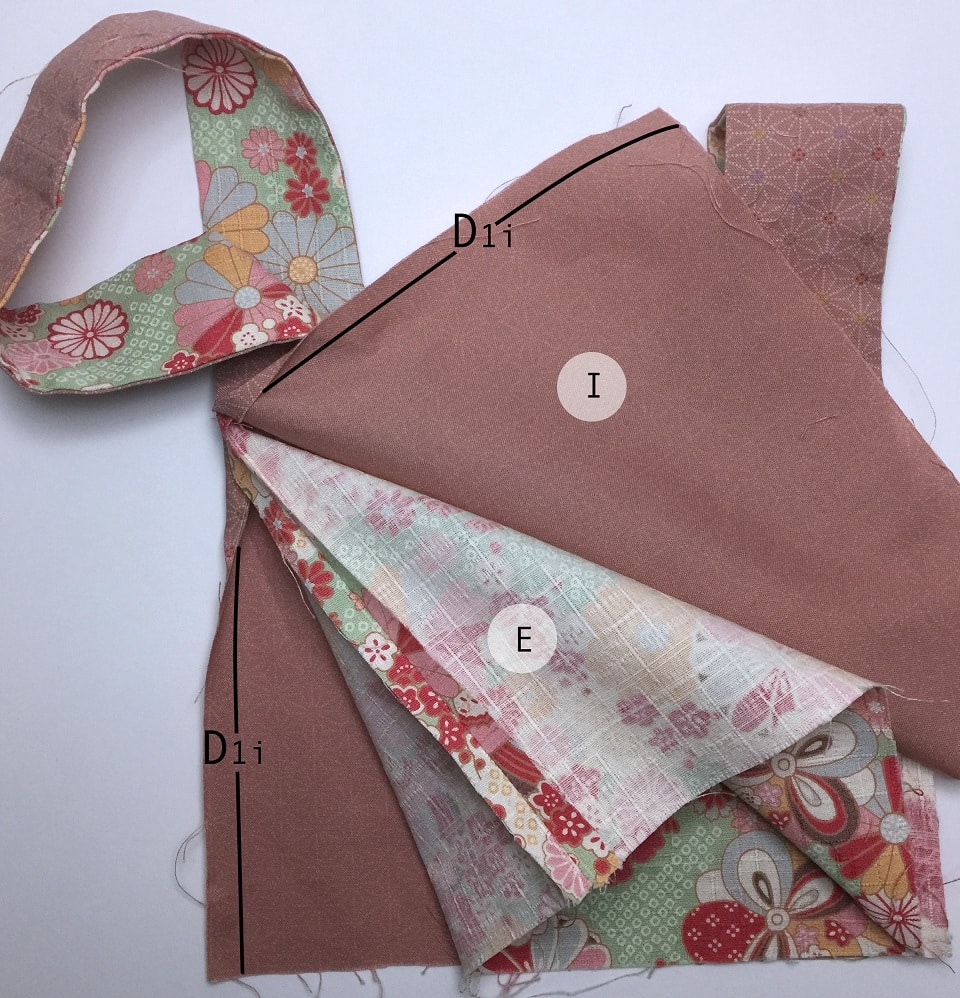
Sew the two opposite lines D1e together and do the same for the lines D2e.

Step 5
Same procedure for the D1i lines of the inner fabric.
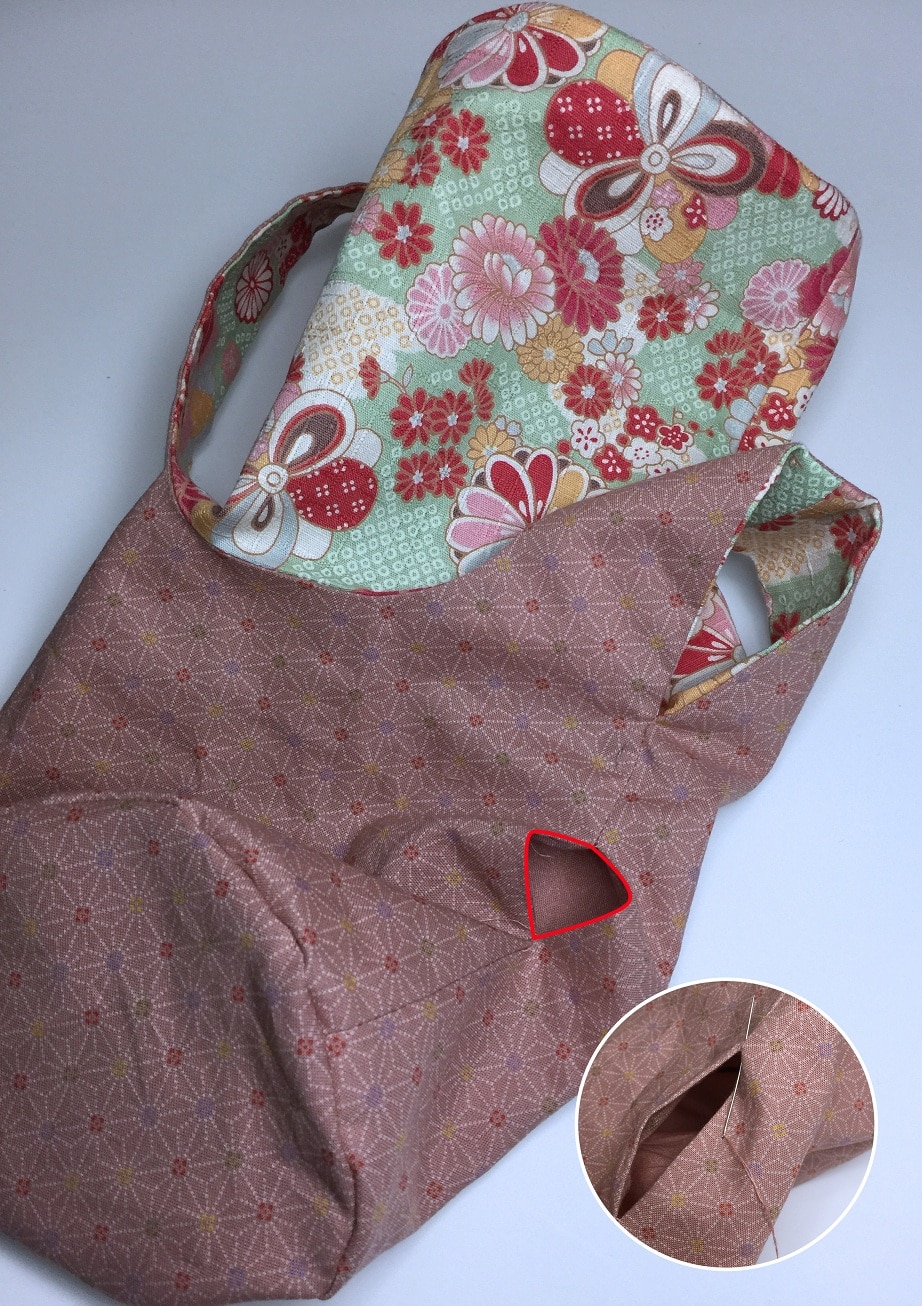
But be aware that for the D2i line you will need to leave an opening of a few centimetres to allow the bag to be turned over later.
Step 6
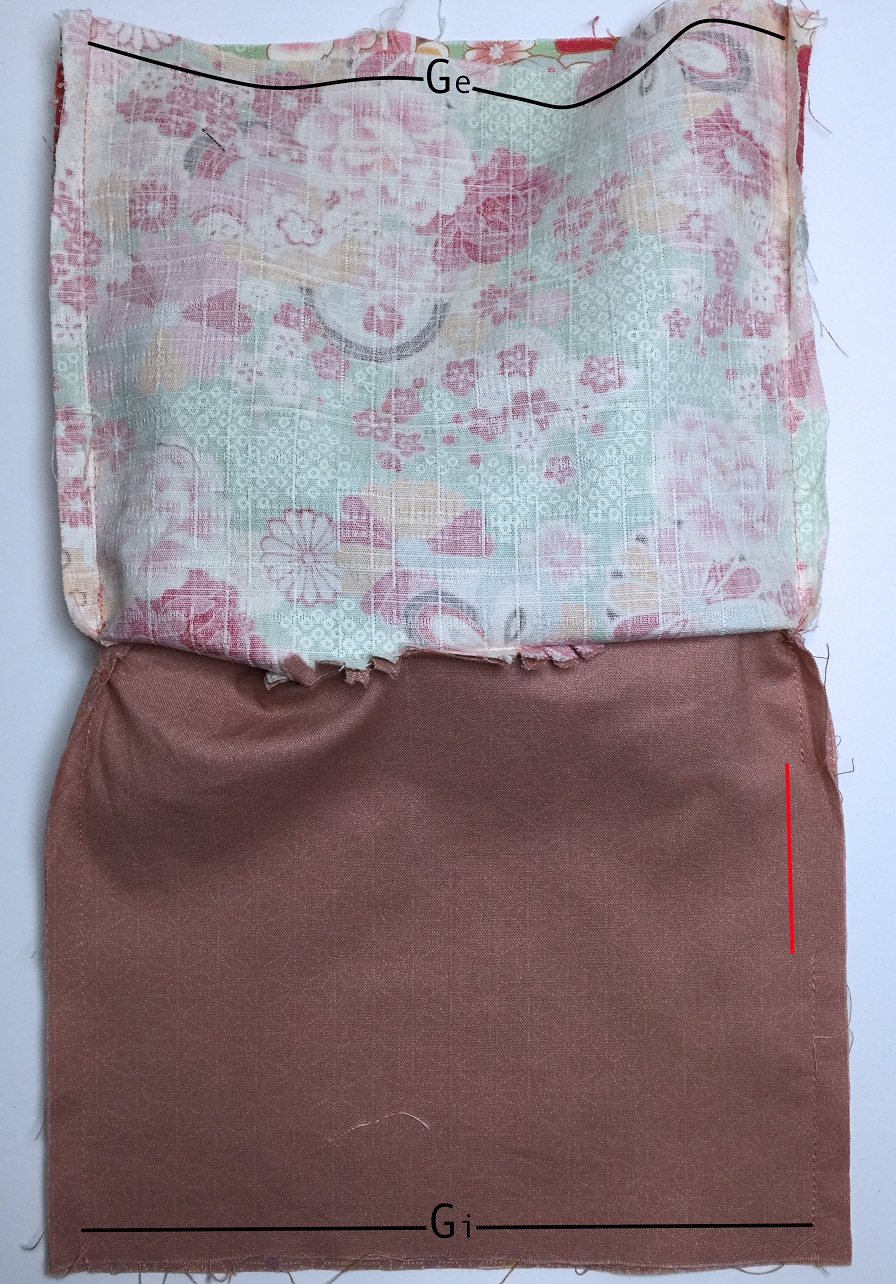
Sew the bottom F1 with Ge
Step 7
You can reinforce the bottom by sewing an extra seam around the base of the bag.

Step 8
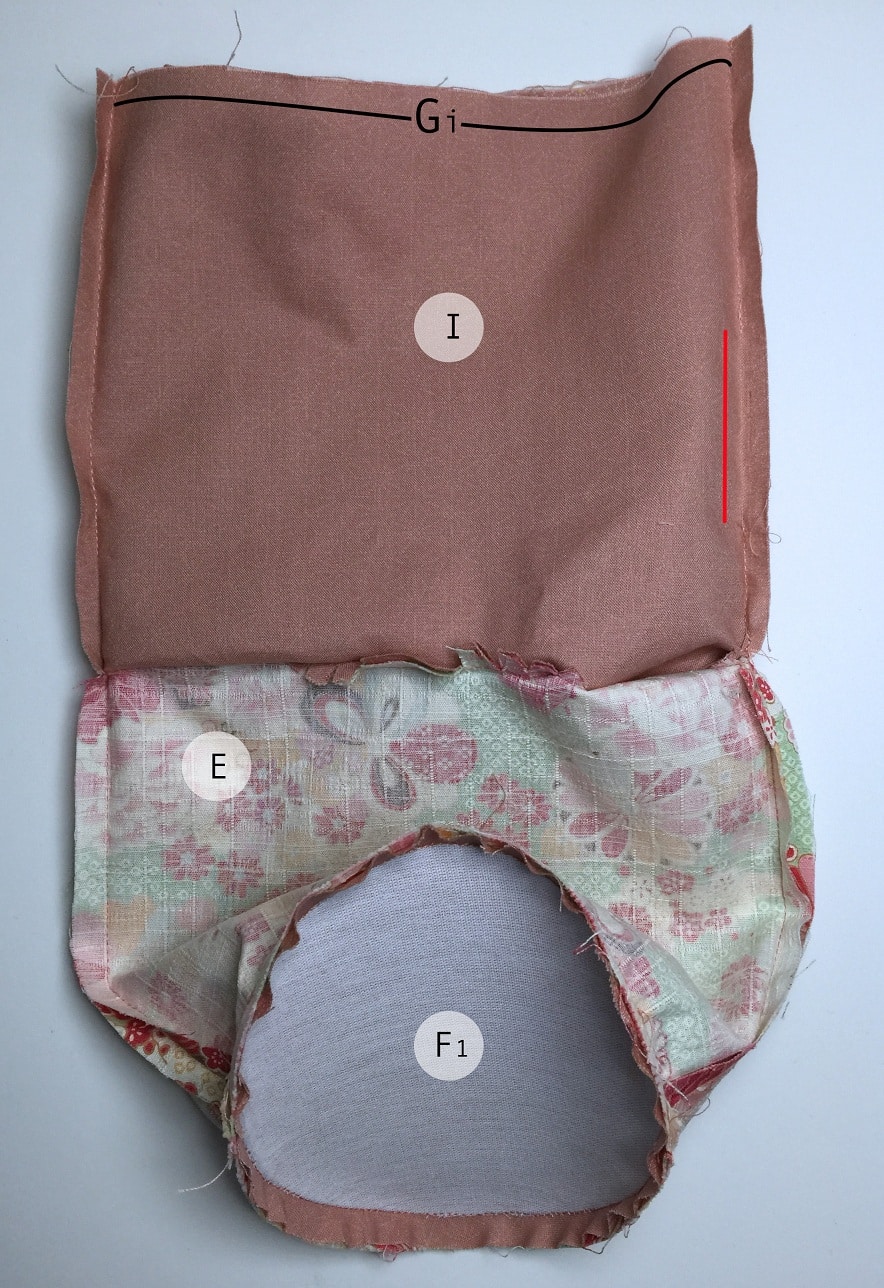
This is what the opening we left when sewing the D2i lines is for. It allows you to turn the inner fabric inside out to sew the F2 background with Gi.
Here is the result after sewing.

Step 9
Close the opening we left in step 5.
Step 10
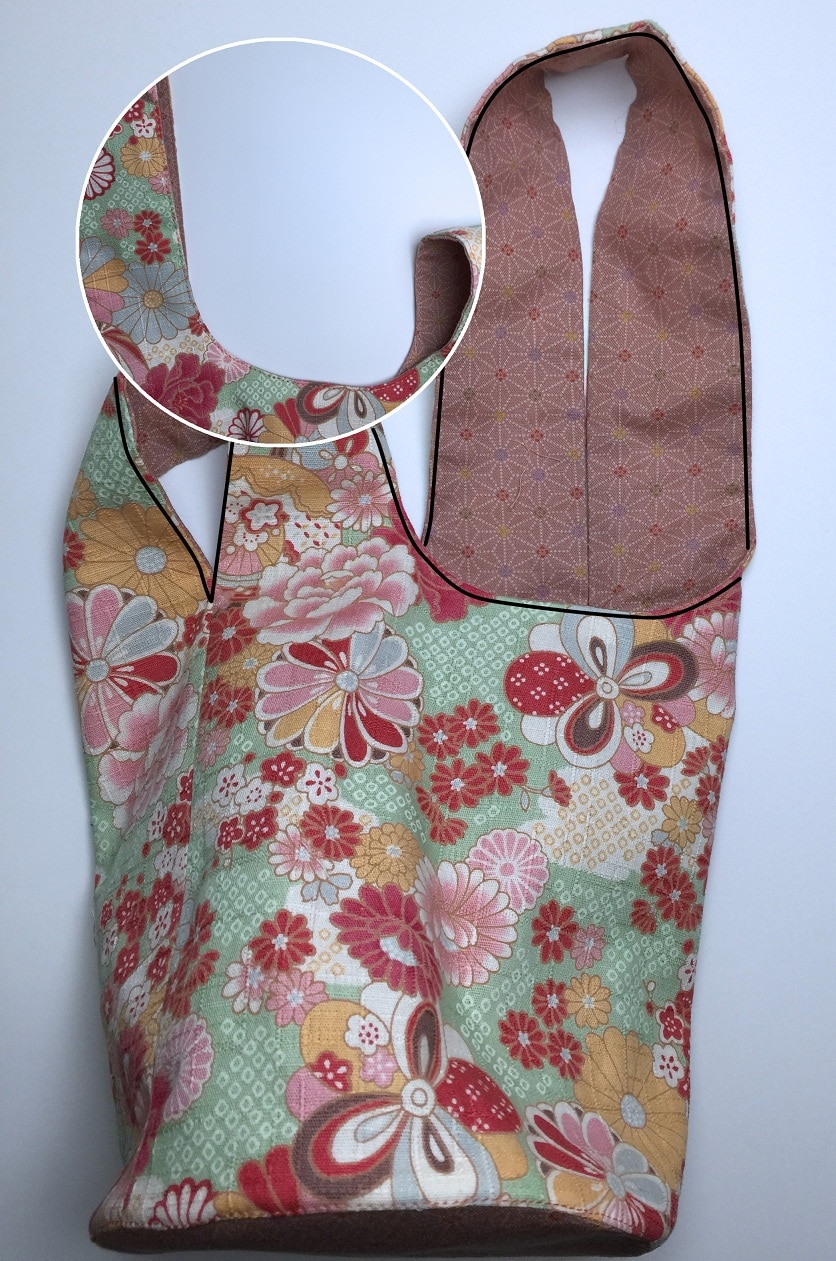
All that’s left to do is to finalise your bag by applying a seam along the handles of the bag to reinforce it. And that’s it.
You made it ! お疲れ様でした!

Are you stuck somewhere? Don’t hesitate to ask your questions in comments so that I can help you!
If you liked this DiY, you can share it on social networks. See you soon!
